Setting up calendar synchronization with Google
On this page
1. Sign in to the Google Cloud Console
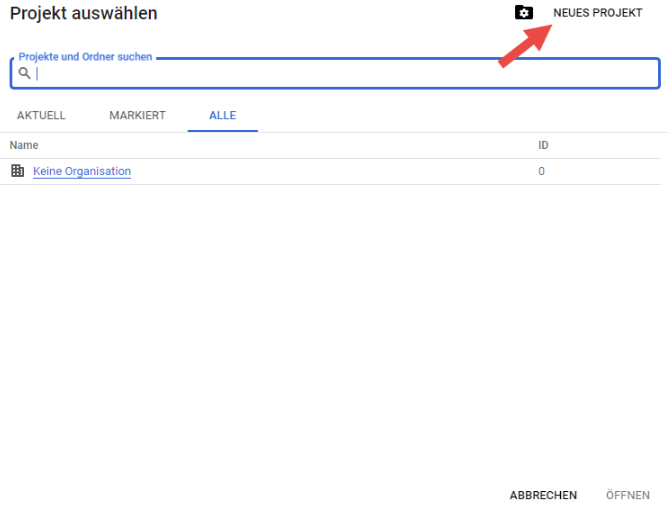
2. Create a new project

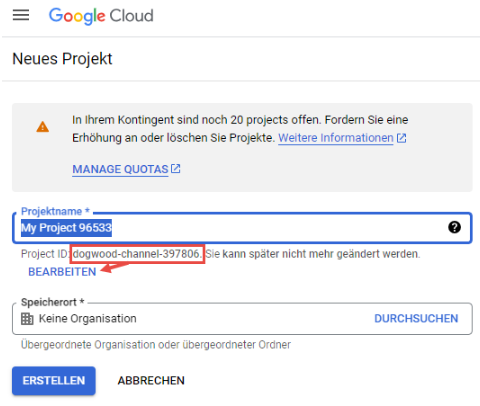
Every project needs a globally unique project ID. Google suggests one for simplicity. In the specific example, it is „dogwood-channel-397806“. If you want to assign a different project ID, click „EDIT“ at this point.
CAUTION: The project ID cannot be changed later.
3. Homepage with selected project
After selecting a project for editing and accessing the homepage of the Google Console, it looks something like this. In the specific example, the project’s name is „Cal-tabuni.“

4. Set up the OAuth consent screen
Open the menu and select the OAuth consent screen under APIs and Services.

5. Create the OAuth consent screen
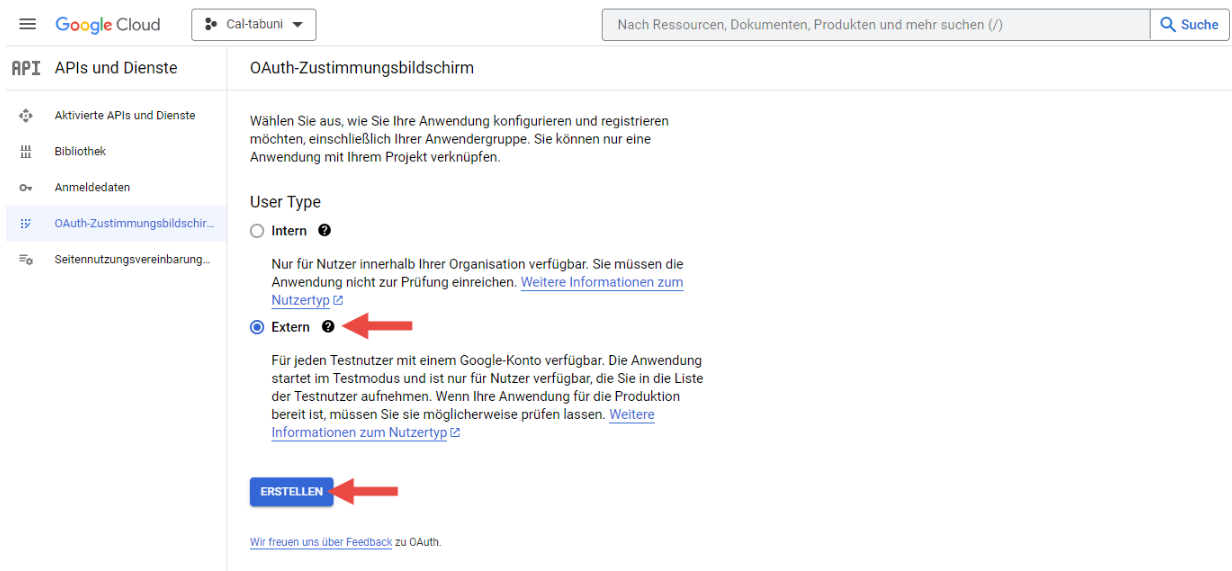
6. Edit Application Registration
Editing consists of 4 steps. Certain information is necessary for a smooth process. Only this specific information will be discussed below. Other entries may be obligatory but are not crucial for functionality and will not be discussed below.
Step 1: OAUTH Consent Screen
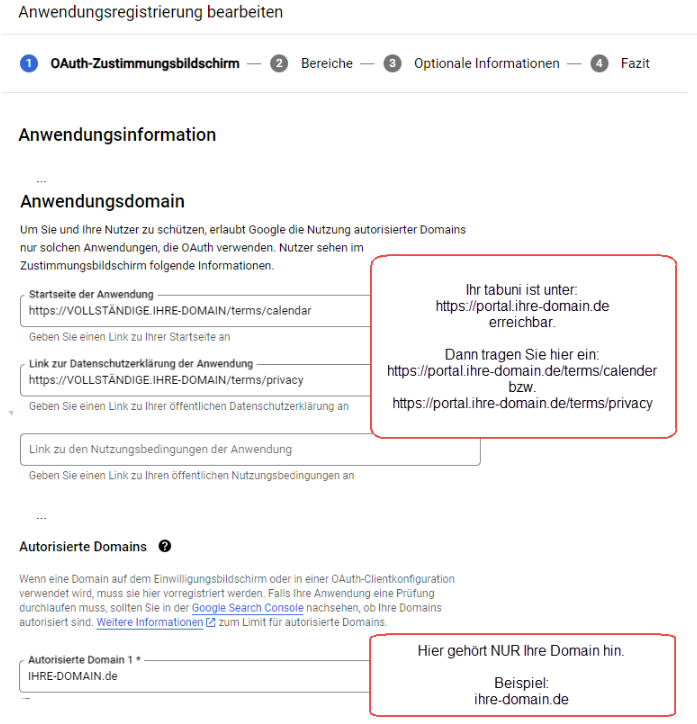
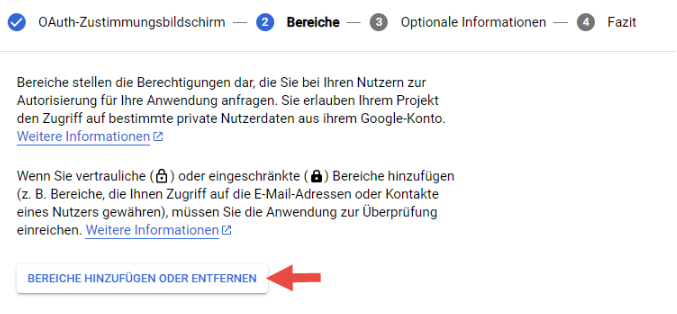
Step 2: Scopes
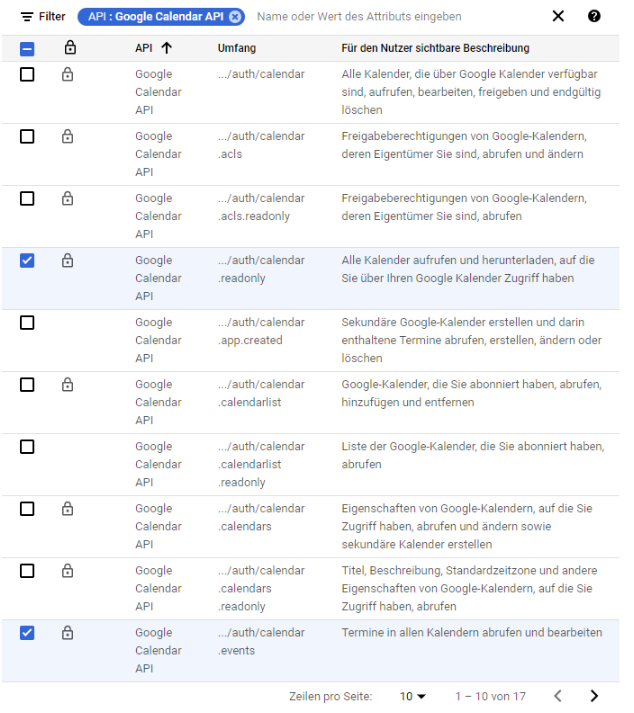
Set the filter to API: Google Calendar API.
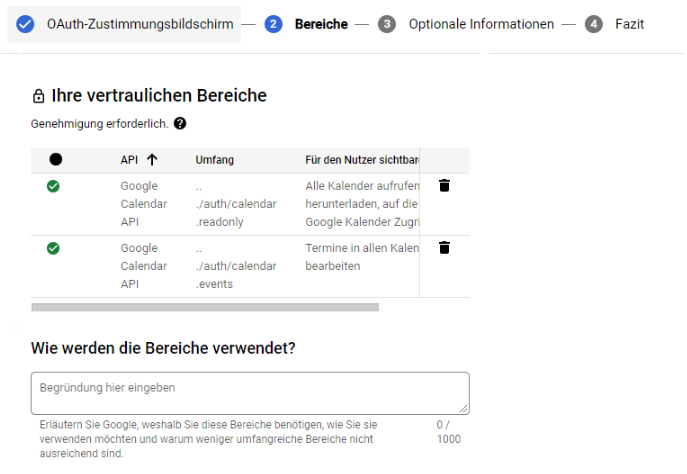
After selecting the confidential scopes, Google will ask you to explain why you need them. You can use the following sample text. It is possible that Google may ask further questions.
The calendar of the submitted web application should be synchronized with Google calendars. For synchronization, it is necessary for the owner of a Google account to sign in to their Google account. After successful login, the calendars of the Google user should be displayed as a list for selection. If a calendar is selected, the submitted web application should be able to read, create, and edit events in the corresponding Google calendar.
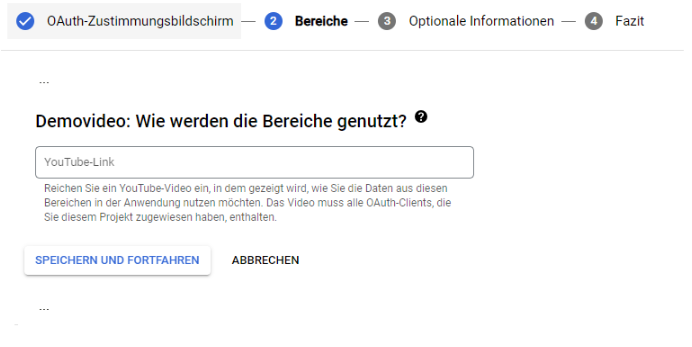
Google requires a video showing how your tabuni accesses the Google API. Once you have set up the Google API for testing for specific Google users, you can create the video. The video must show:
- Your tabuni
- User login
- Accessing the OAuth consent screen, where the name of your project, your project ID, and the Google scopes used are visible.
- Practical use of the API (demonstrate how events are read, created, and/or edited)
Here is a sample video that meets Google’s requirements.
7. Download OAuth client
If you have completed Step 6 (Edit Application Registration) except for the video and the API is in „Testing“ status, you need to download the created OAuth client.
In the menu, click on APIs and Services, and in the expanding menu, click on Credentials.

On the Credentials page, click the download icon for the corresponding API. Send us the downloaded Json file by email.
